The outdated telephone-based manual system must be replaced by an automated system for businesses requiring appointments or bookings. The process is time-consuming and wasteful, and you can better utilize resources if you use an online appointment scheduling tool. A well-planned appointment schedule can significantly affect your business outcomes.
Developed by 500apps, Schedule.cc is an appointment scheduling software that allows professionals and businesses to schedule appointments and make bookings more efficiently. You can create appointments and meetings on your calendar and share them seamlessly with employees around the world.
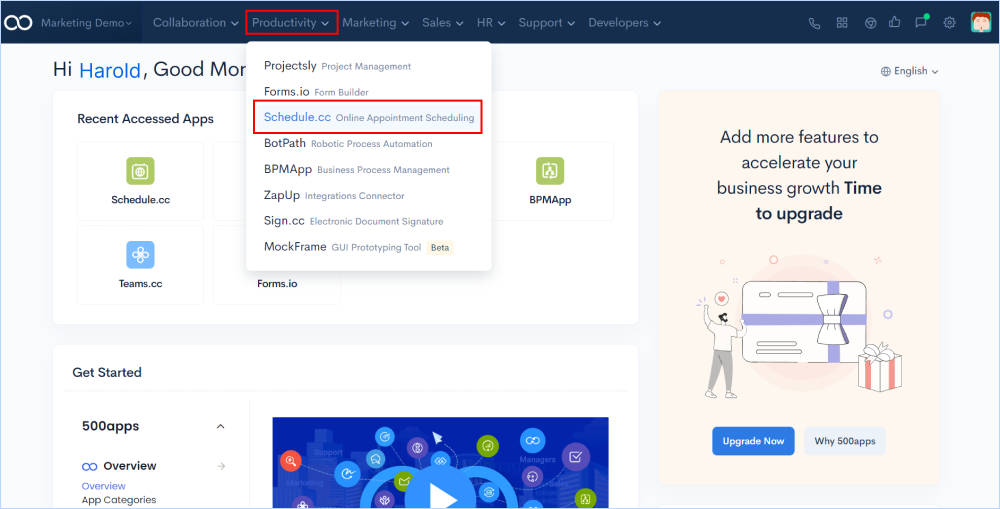
Go to infinity.500apps.com > Find Productivity on the top section of the suite > Select Schedule.cc from the dropdown option under Productivity
Start adding new projects to the workspace by giving them a specific name, description, and unique icon.
Click on Add Project and find the window (Add Project) to give project details.
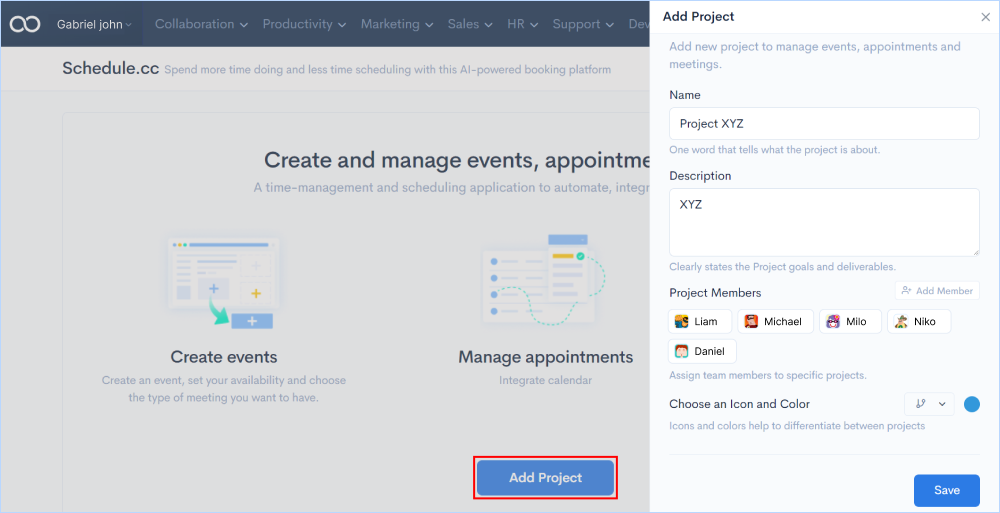
Add project team members from the existing list or invite them through the mail.
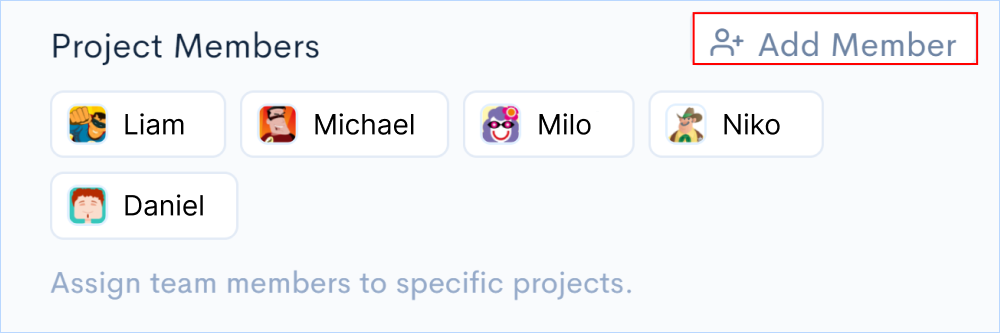
Click on Add Member from the Add Project window.
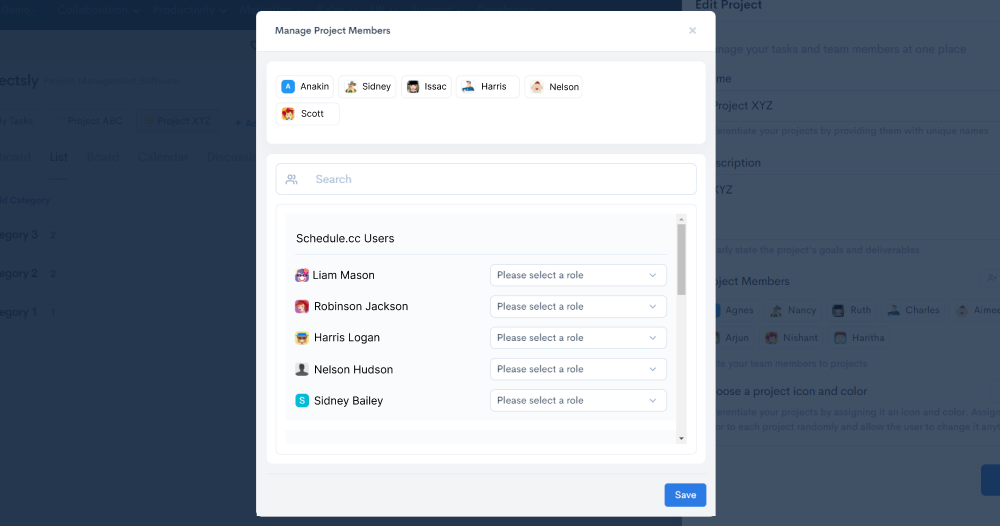
Assign specific roles to each member by adding them to the project. Once the members are chosen, click on Save.
You will enter into the workspace of Forms.io where you’ll be displayed with all features of the application.
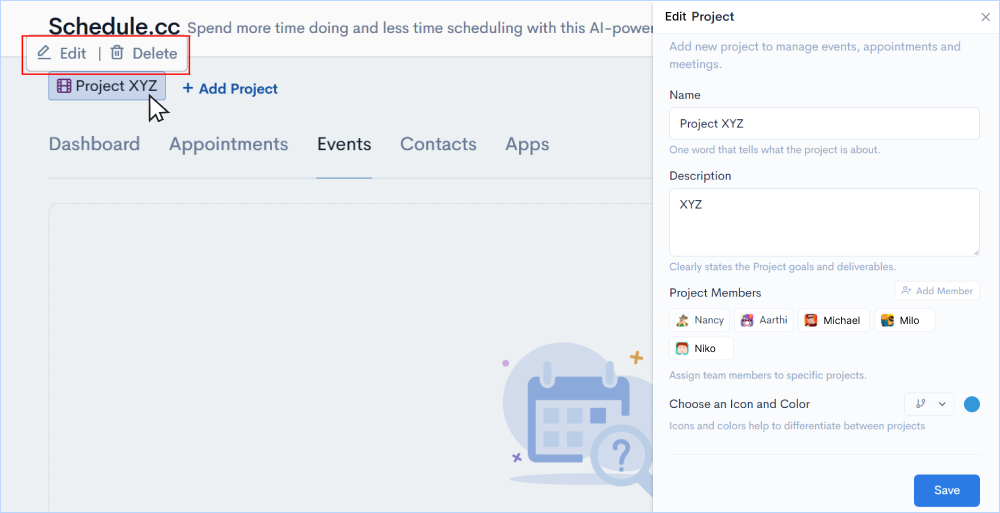
If you want to make changes to the project you have created in terms of name, description, more members to be added or remove, you'll get the edit option to do the same. Hover over the project you have newly created and you'll find the Edit and Delete options. Click on the Edit button to make changes to the above mentioned details or click on the Delete button to remove the project you have created.
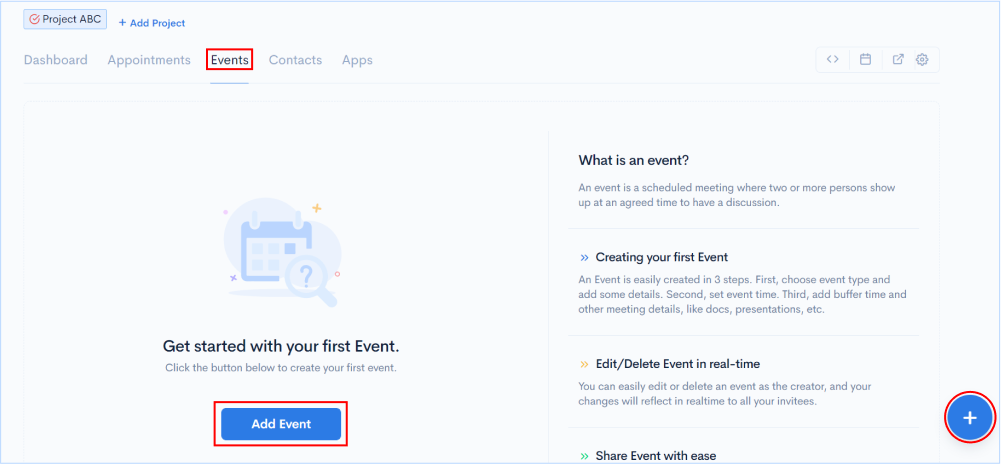
Schedule meetings with your clients through the event scheduler by providing specific details about the mode of meeting, the timeslot, and other relevant details.
Go to Events in the features tab >> Click on Add Event or click on the "+" button on the left bottom corner of the screen.
The first step to creating an event is to provide the meeting name and description. Then proceed with giving the meeting type, duration of the meeting and the location for the meeting to take place.
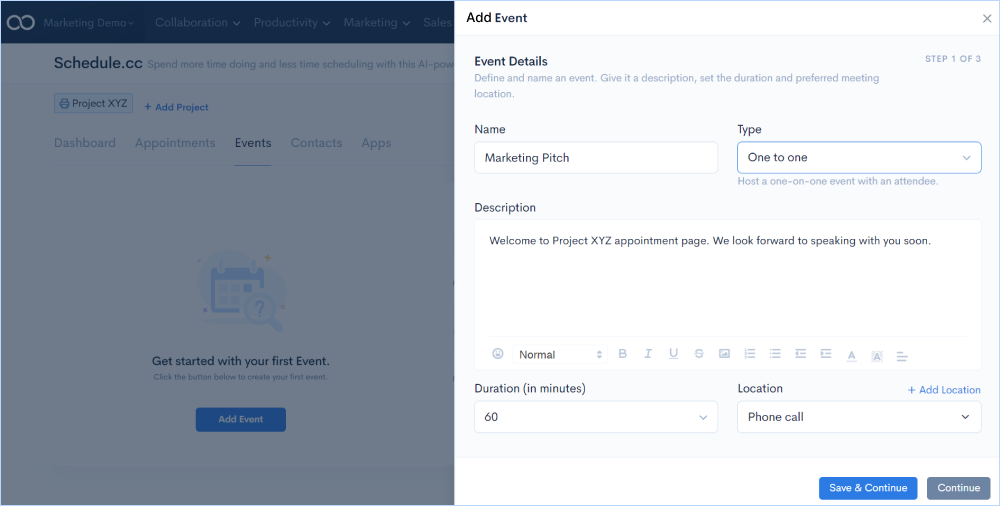
Meeting Types
One-on-one - Schedule open meetings for clients and colleagues
One-to-many - Multi-attendee events, such as webinars and training sessions, can be booked
Meeting Location
Choosing the location type gives you the option to select the mode of meeting.

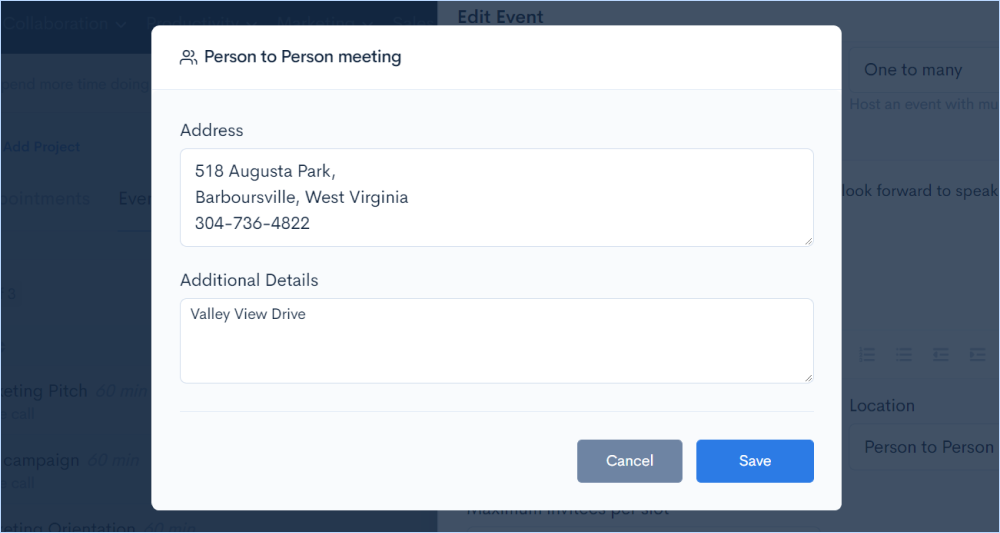
Direct meetings with your clients can be scheduled at a specific time and location. You can mention the address of the location where the meeting needs to be held.
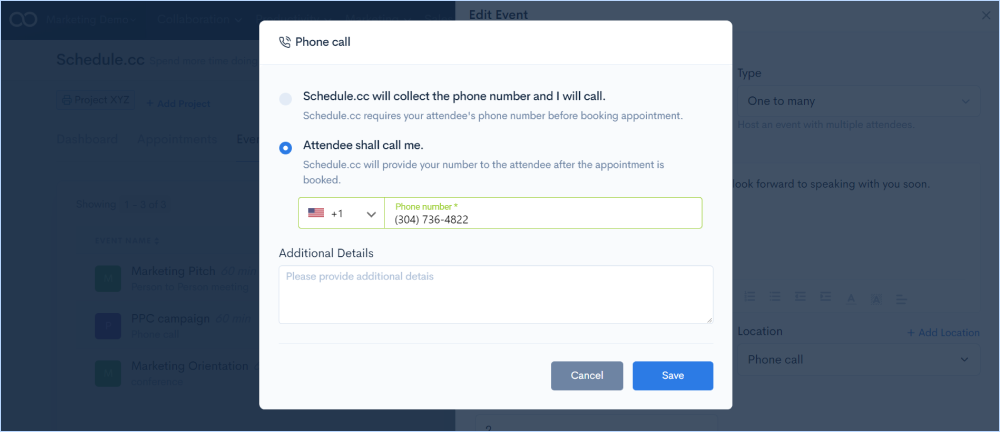
If you want to schedule a meeting with a client over the phone, you can either provide the attendee with your number or Schedule.cc will ask for the attendee's phone number for you to make the call.
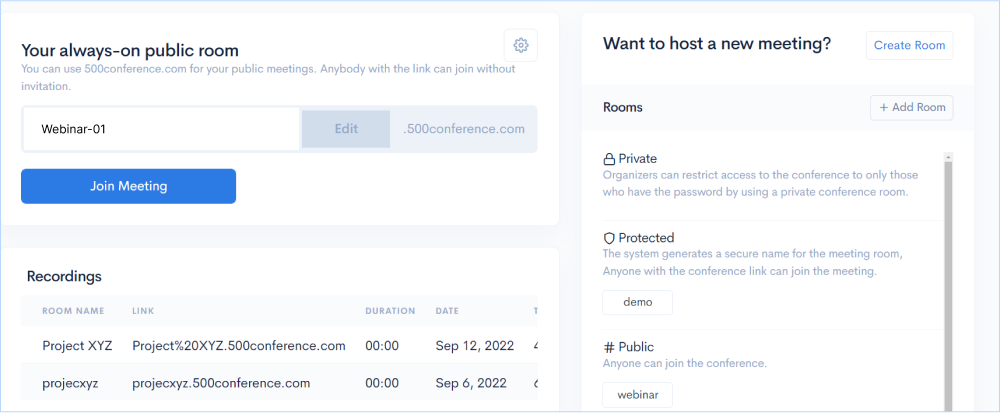
You can organize webinars or seminars using the built-in video conferencing software (500Conference) to communicate with multiple clients at the same time.
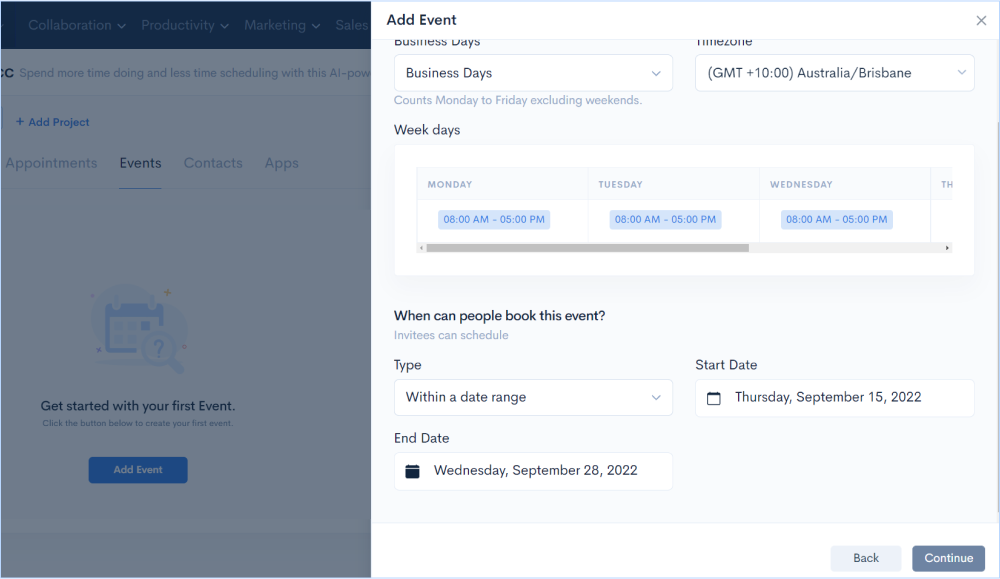
Set the time zone and business/calendar days for when the event will take place. If you want the meeting to be happening regularly intervals of time you can set them according to the calendar.
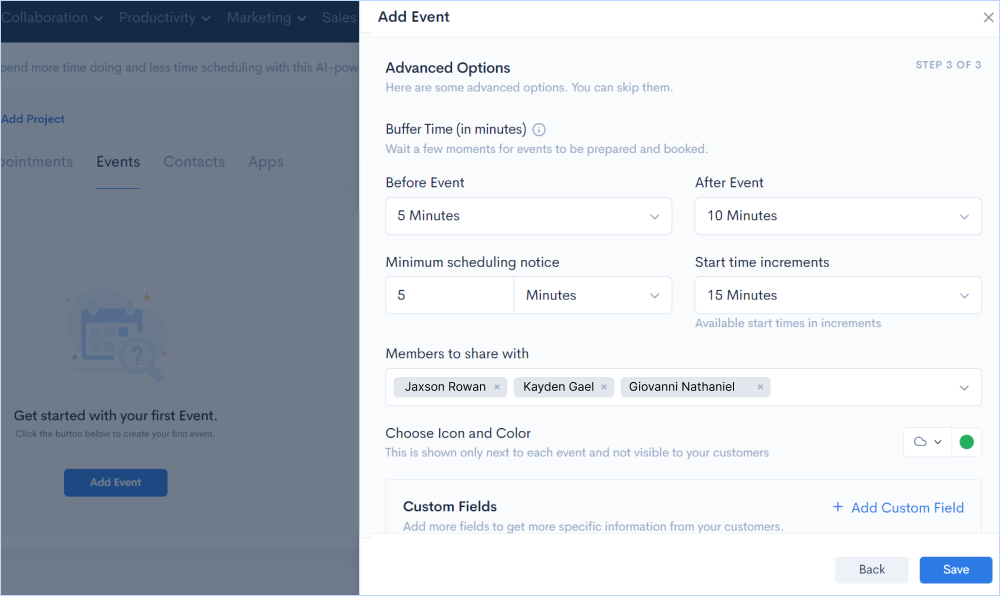
Exceptional time can be added prior to and/or after an event. The extra time can be helpful for preparing for meetings, traveling to events, or cleaning up after presentations.
You can set the buffer time before or after the meeting along with minimum scheduling notice and start time increments. Even you can add custom fields to get more specific information from your customers.
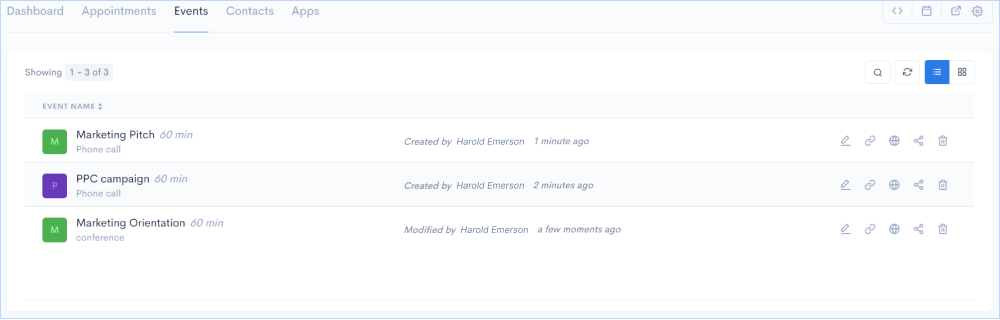
Once you have given all the required details to schedule the event click on the Save button. In the same way you can start scheduling more events and the list of scheduled events get populated in the Events section.
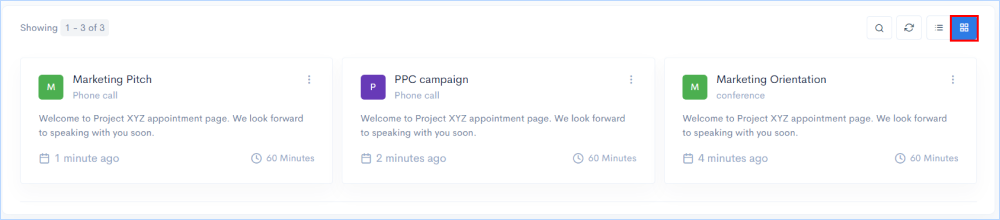
Grid view
You can switch the list view of the scheduled events to grid mode to get comprehensive view of the events as per your convenience.
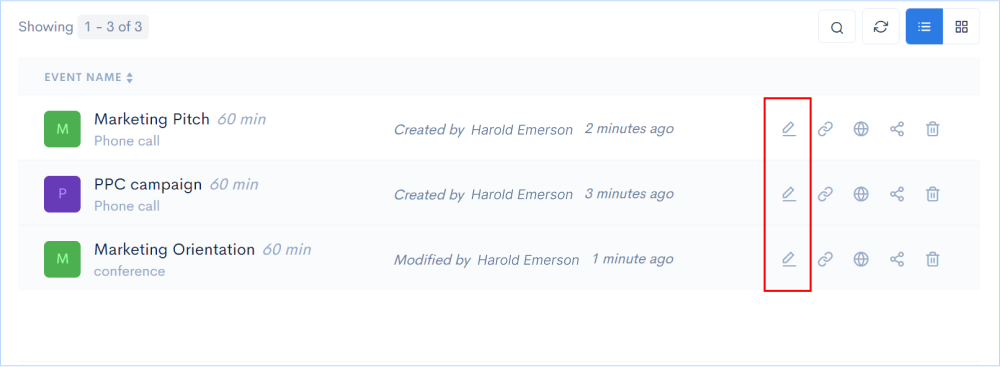
Any changes to the events can be made at any time without any hassle. Attendees or hosts can reschedule appointments according to their convenience.
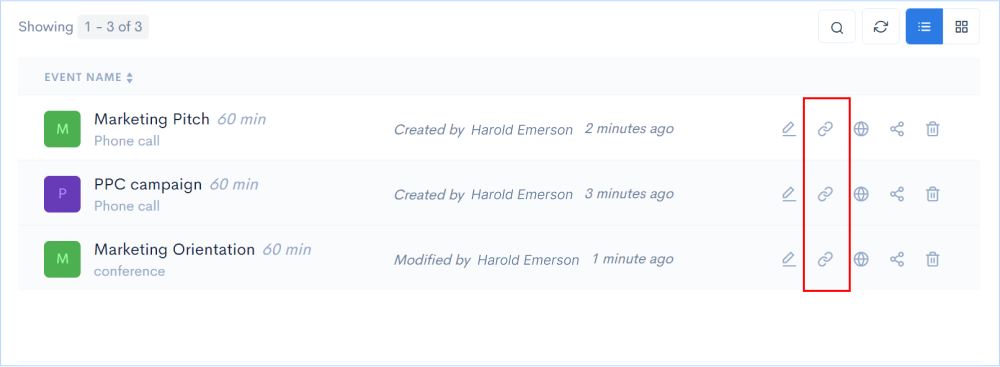
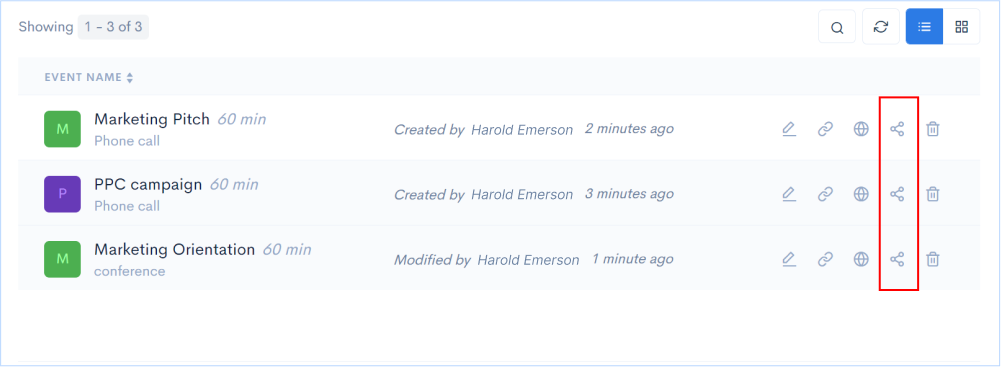
Generate booking links for the events that are created and share it with your clients or collegues directly.
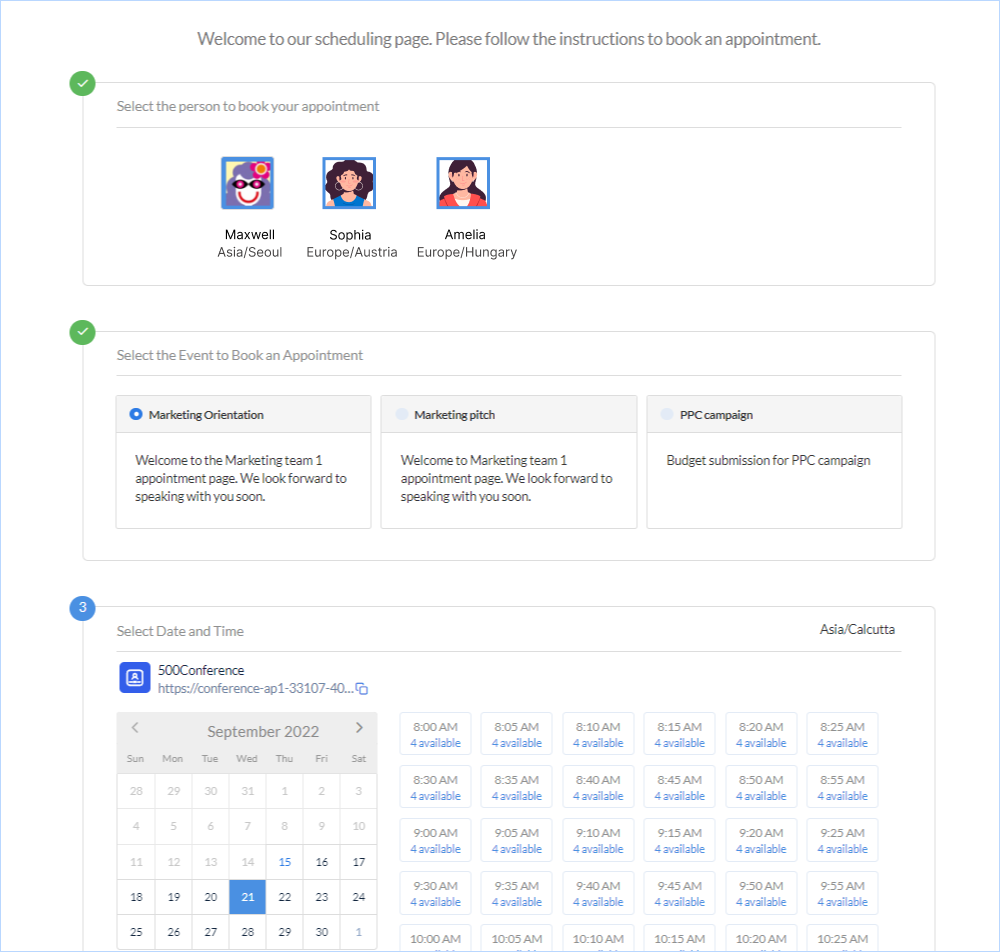
Here is the view of the scheduing page that will be opened while clickng on the event booking link:
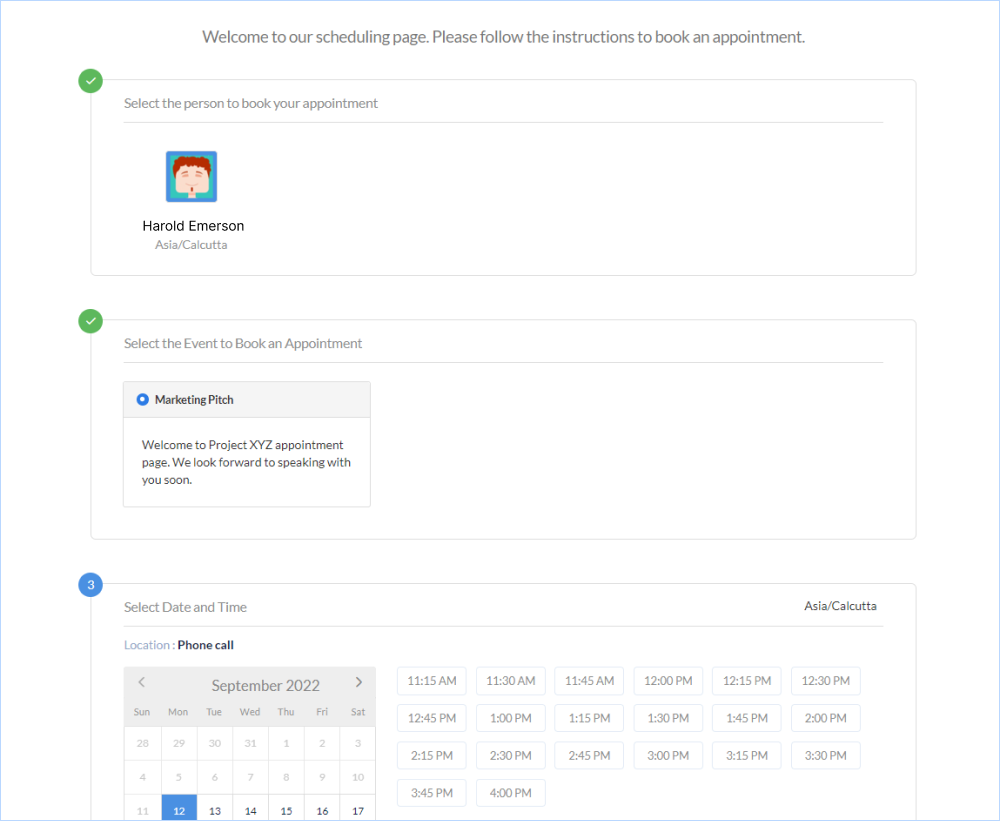
Share the meeting scheduler to your clients through email with specific notes and let them book the slots easily.
The appointment scheduler lets you check all the meetings that has been scheduled, get the status of each one of them, and schedule new appointments in the best way possible.
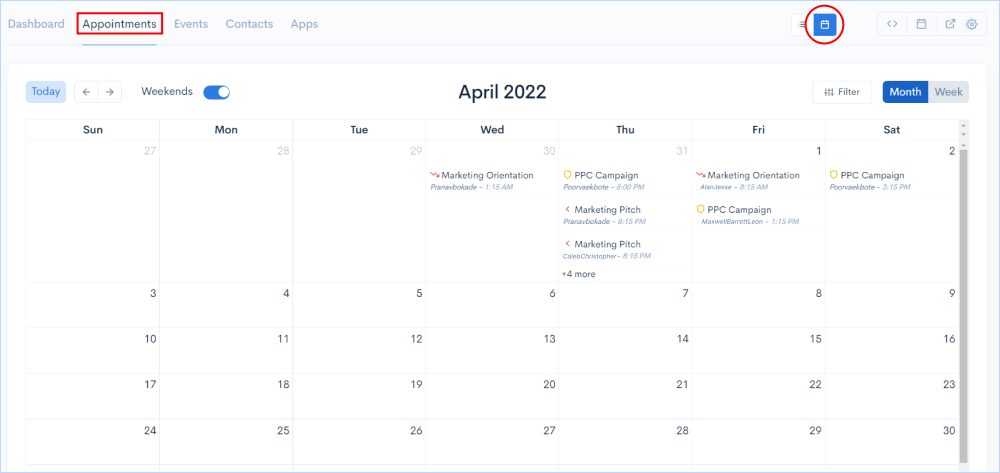
Go to Appointments in the features tab.
Get the comprehensive view of all the events/meetings scheduled in the calendar scheduler and be prepared for the them accordingly. You can also change the calender view based on months or weeks as per convenience.
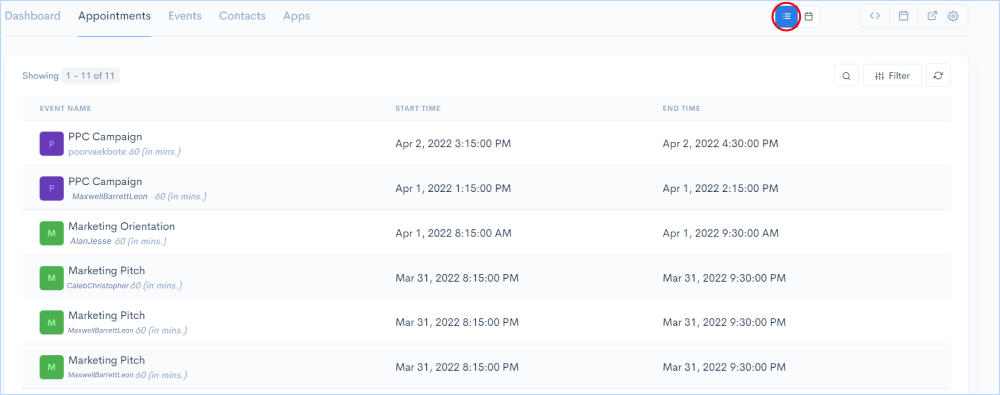
Switch the calendar view to list mode with the events being well organized with no clustering, letting you to manage them easily.
Create appointments from the calendar by choosing a specific date. Start with selecting the owner for the meeting and provide the name and description for the meeting to be scheduled. Set the start and end dates for the meeting and invite the attendees for the same by providin the email IDs.

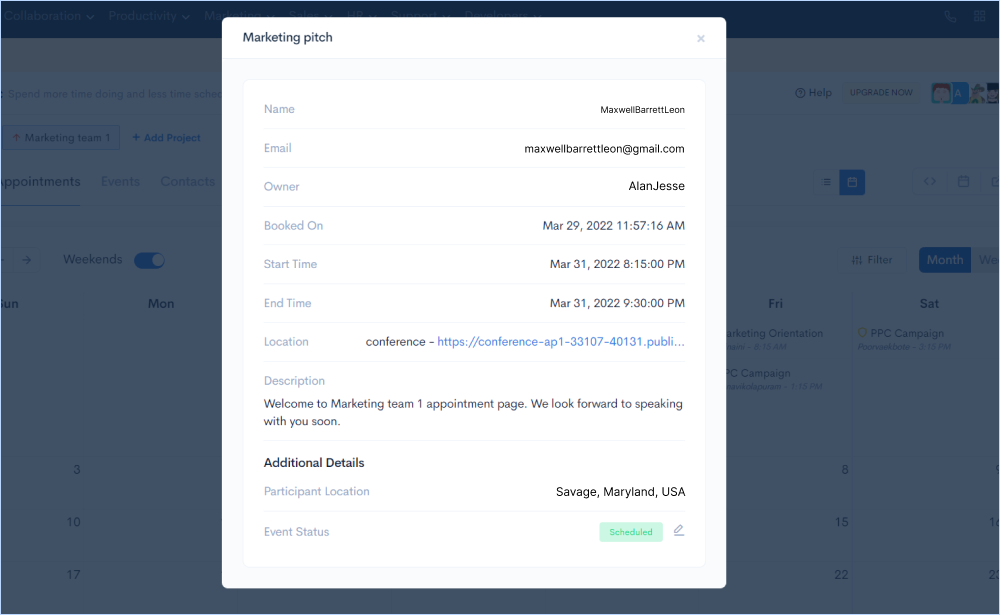
Get the complete status of any event being scheduled by choosing that specific event from the calendar.
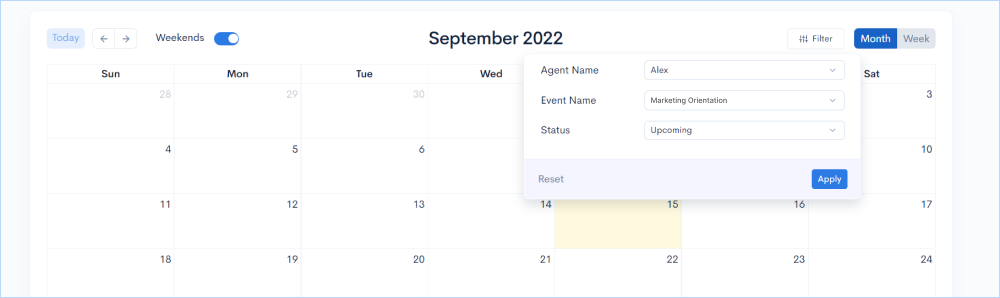
Filter out any upcoming, past or cancelled event based on agent name, event name or status of the event and manage them separately.
You can convert leads and potential customers by embedding an appointment scheduling widget on your website. You will achieve a higher conversion rate if you let your website visitors know your availability immediately and book right away than if you offer a phone number, email address, or inquiry form.
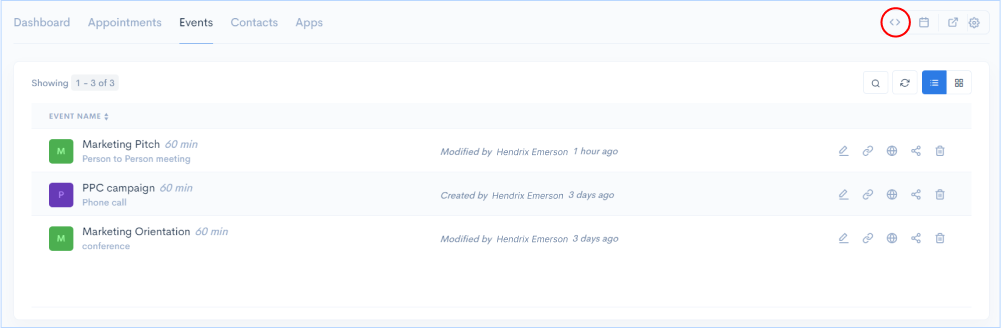
Go to Widget Code (<>) on the top right sie of the screen.
By clicking on the widget code button and you will get a window with a HTML script. Copy the script and add it to your HTML Pages before the end of the
tag. Save and publish the page. The End user page is embedded as widget in your page.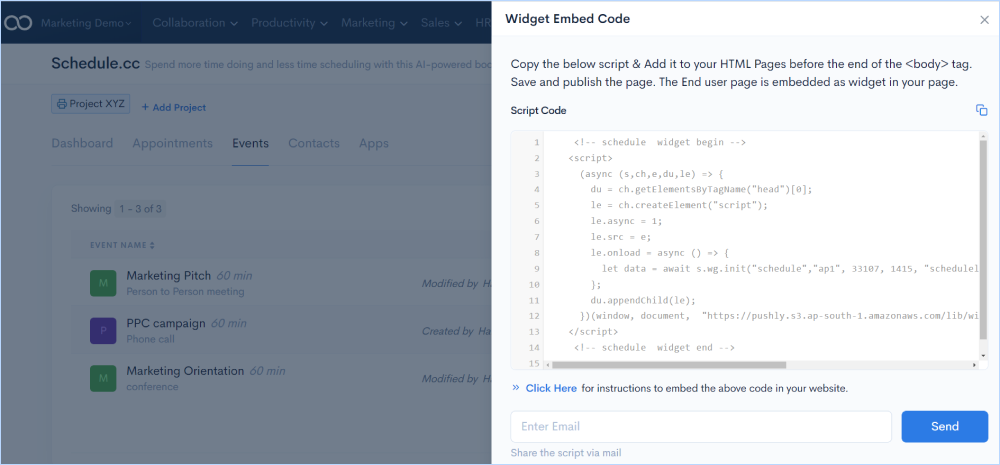
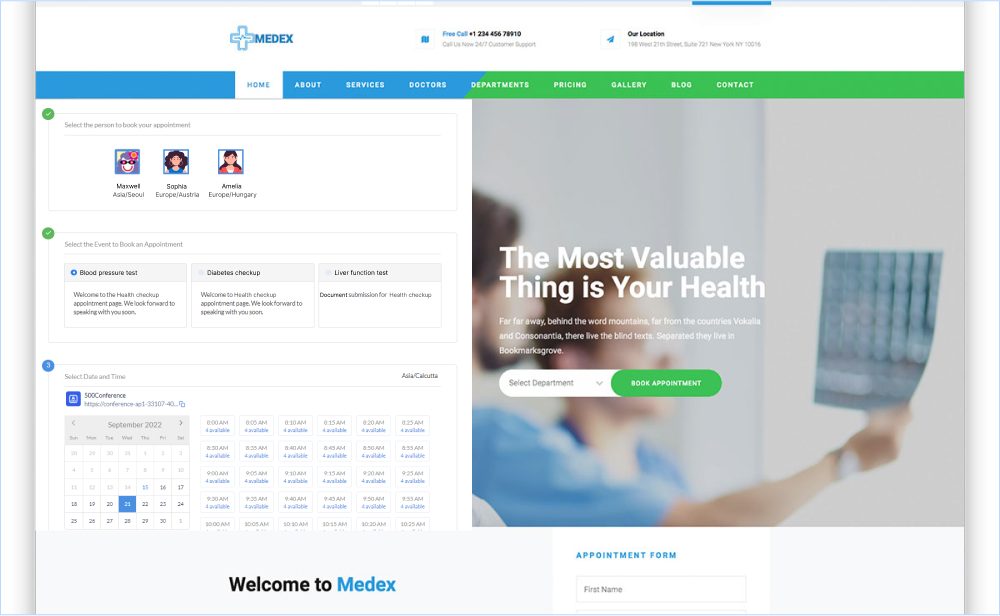
Here is an example of the appointment scheduler being embedded in a website.
Get the link to the scheduling page that shows all the events you've created in Scheduly along with the owner's details so that clients can see which events they want to book.
Go to the Events Booking Link on the top right side of the screen.

Here is the view of the scheduing page that will be opened while clickng on the event booking link:
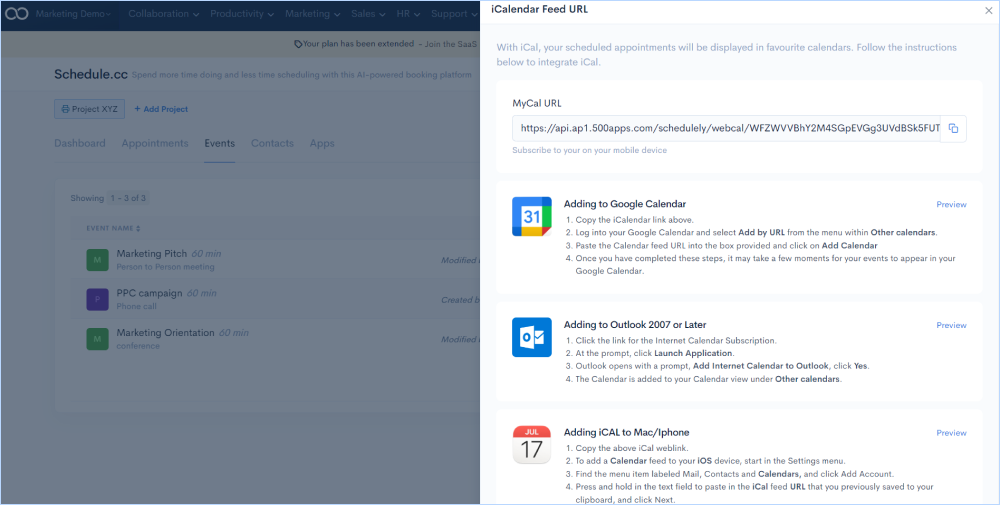
Integrate Schedule.cc with your daily calendars - Google Calendar, Outlook Calendar, Mac/iPhone Calendar - and see all the appointments being scheduled to follow up.
Go to Subscribe to iCal button on the top right of the screen. You'll find a window that explains how to integrate the 3rd-party calendars with Schedule.cc.
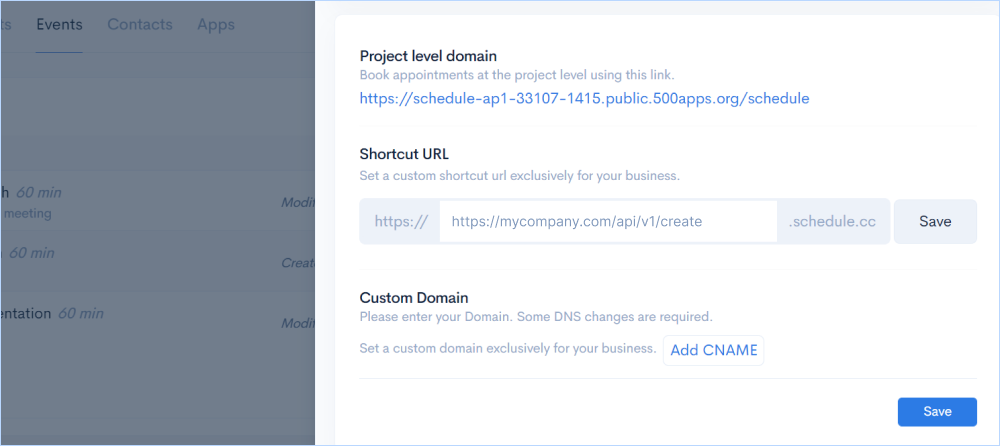
With Custom Domains, you can promote your organization's brand in the URLs of your appointment scheduler. You can use a custom domain if you don't want any reference to Schedule.cc in your form URL.

Book appointments at the project level using this link and set a custom shortcut URL exclusively for your business
Book appointments at the User level using this link and set a custom shortcut url exclusively for your business.
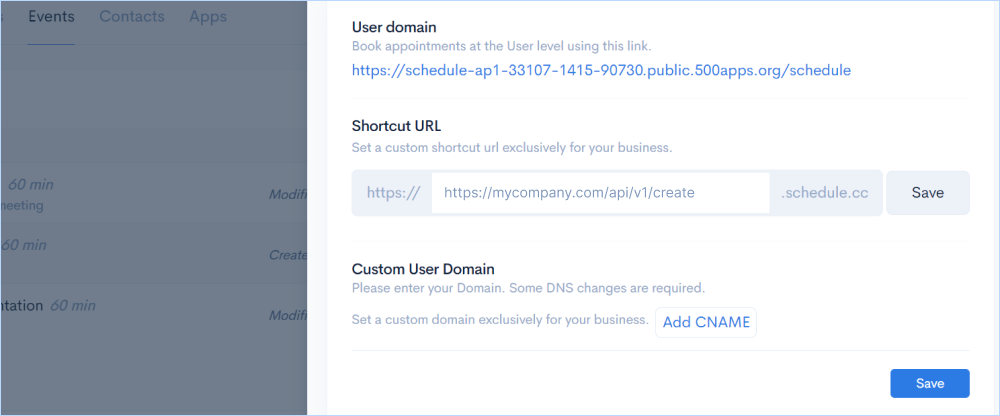
Enter the custom domain name exclusively for your business to be incorporated in the Scheduler URL. It will not take effect until you create a CNAME record with your DNS.
After clicking on Domain you will get a window showing default subdomain and the option to add CNAME under project level or user level domains.
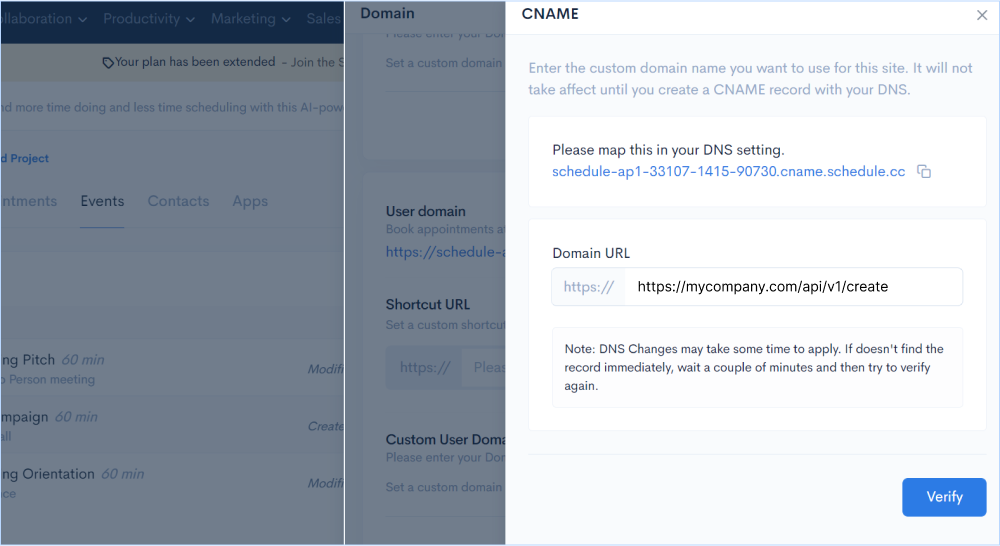
Click on Add CNAME. You will get another window where you will find the URL from Forms.io to map in your DNS setting. Then add the domain URL you own in the action provided.
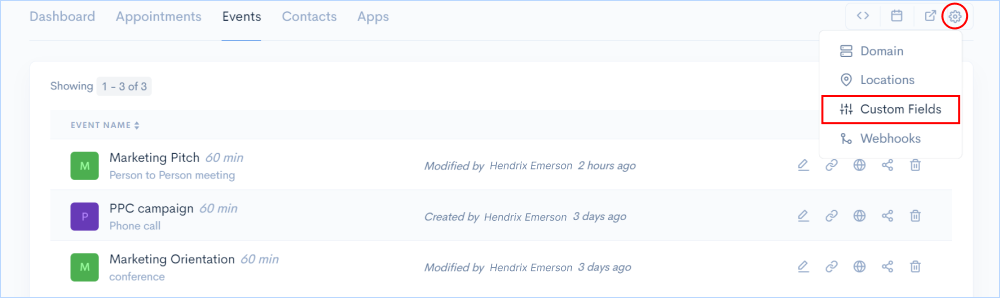
Organize your meetings better with more information from clients by adding relevant fields into the appointment scheduler.
Click on the gear button at the top right corner of the screen and select Custom Fields
Here is how the scheduler will be displayed with the added fields for the client to fill.

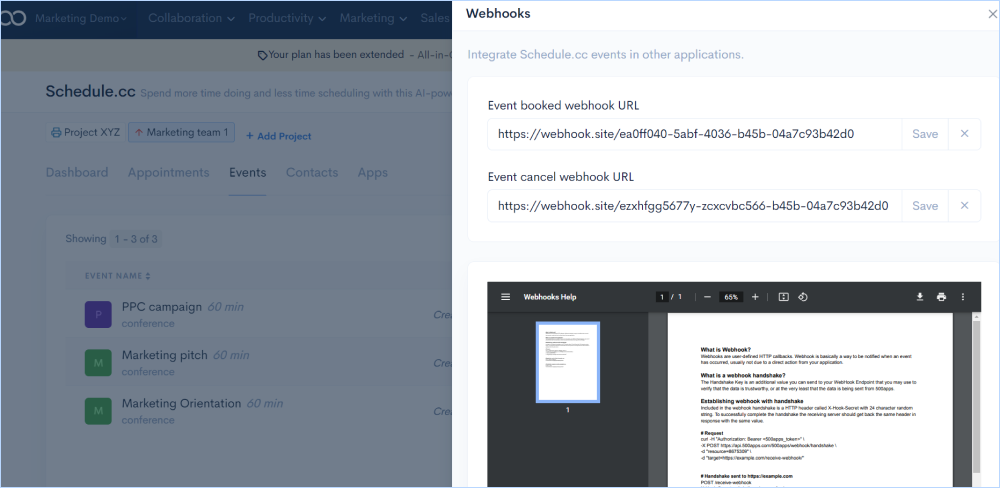
Webhooks are user-defined HTTP callbacks. Webhook is basically a way to be notified when an event has occurred, usually not due to a direct action from your application.
With Schedule.cc, you can set up the webhook by giving the webhook URL from your dayily application to get notifications on when an event is booked or cancelled.
Click on the gear button at the top right corner of the screen and select Webhook
Get the contacts of attendees who have booked their appointments for the event. Once the attendees book their slots by giving their details, the Contacts section populates all the attendee details automatically.
Go to Contacts in the features tab.
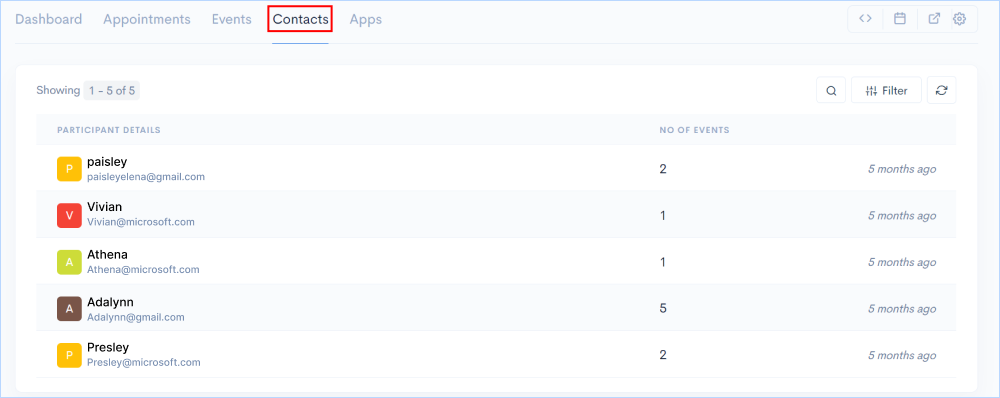
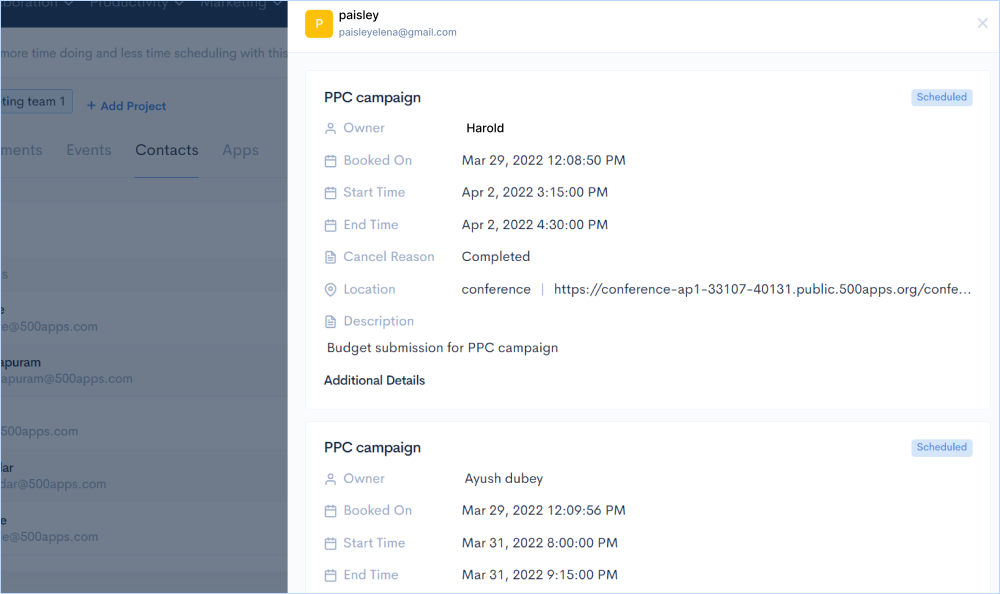
You will get a comprehensive view of all the details associated with the attendees that gives you data on the slots they have booked, timings, location and other additional details. To get this just click on any contact from the list to get a window with all the details.
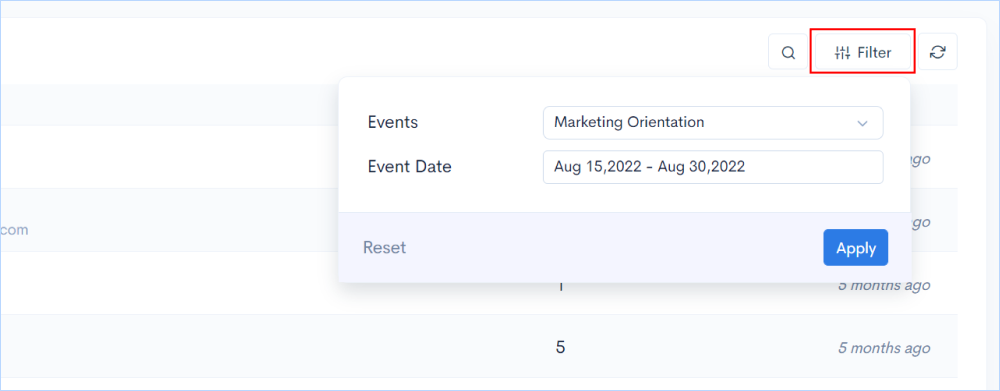
Search and filter out any conatact based on events and dates. To get this go to Filter button on the right side of the screen in Contacts section.
Integrate Schedule.cc with built-in CRM software (CRM.io) to manage your contacts effectively an aslo for uninterrupted scheduling of events.
Go to Apps in the features tab.
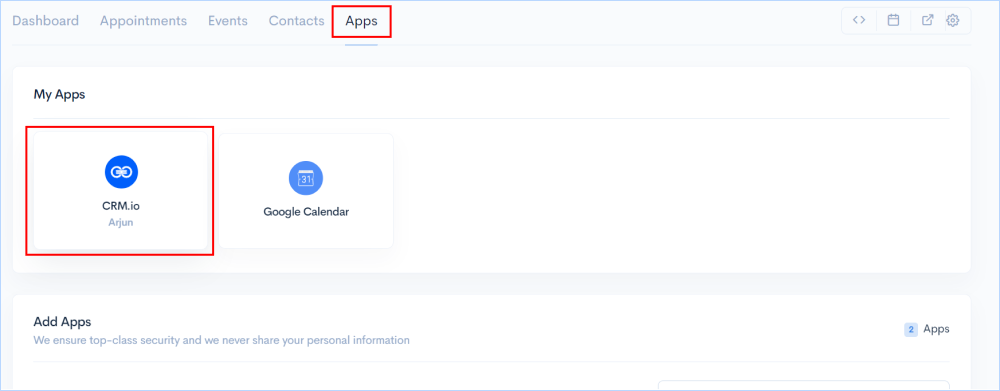
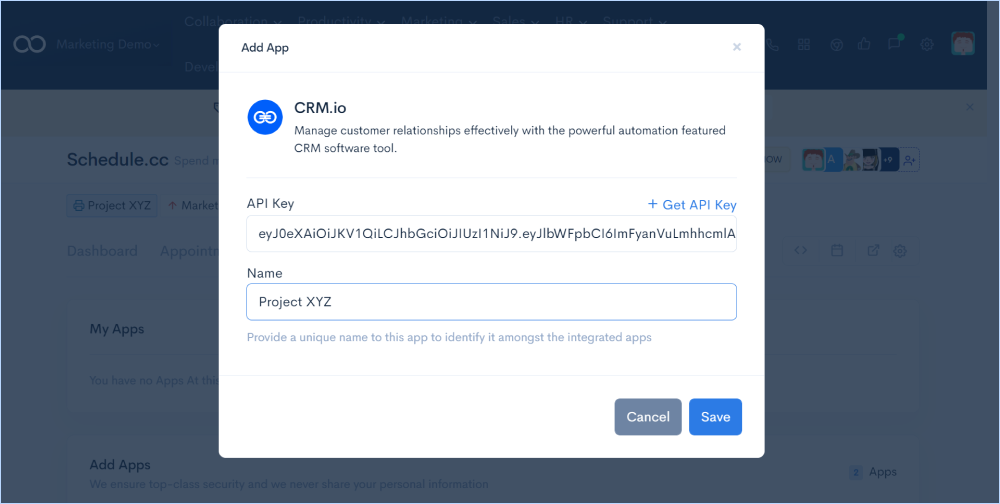
To integrate CRM.io with Schedule.cc, click on the app icon form the Add Apps section. You'll get a window to input the API key of the app. Since CRM.io is in-built, you'll get the option to generate API key automatically. Click on the + Get API Key in the window to get the same. Once the input is given, click on Save button. The app gets integrated with Schedule.cc and it appears in the My Apps list.
Send all the contacts of the attendees who have booked the appointments for various to the CRM being integrated for better lead management.
Intially you should have created a project in CRM.io from the infinity suite of 500apps. The contacts you wish to send to the CRM will be stored in those specific projects in CRM.io.
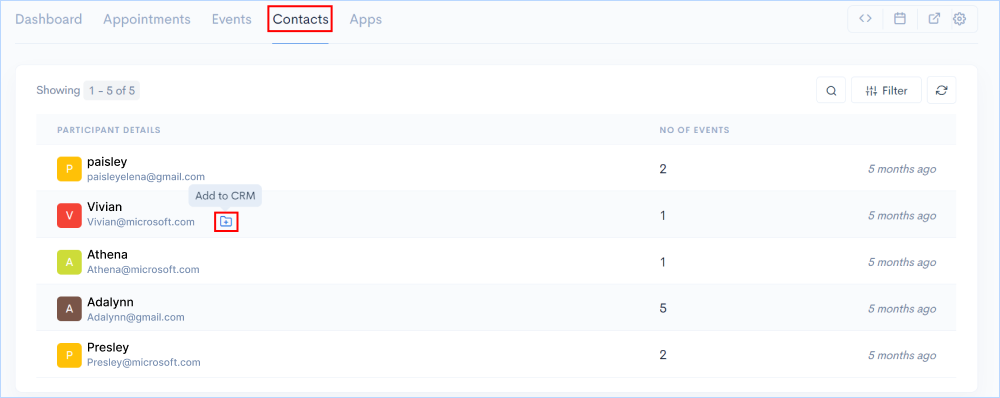
Now go to Contacts tab in Schedule.cc. To export contacts to CRM, hover over any contact you wish to export and you will find an icon stating Add to CRM.
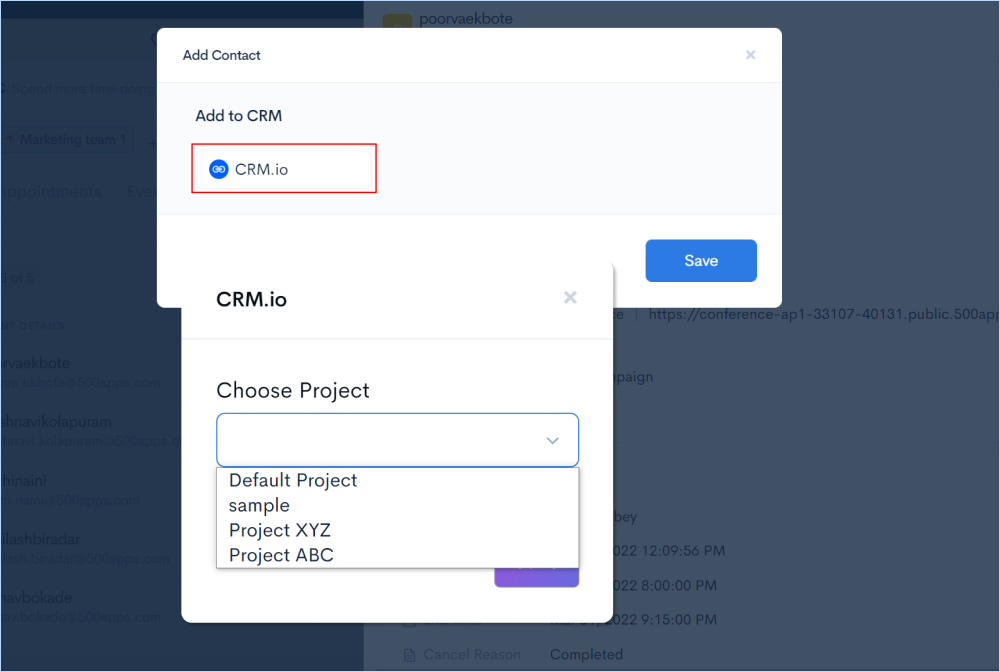
Click on the icon. You'll get a window to select the CRM app to send the contacts. Click on it and you'll see another window displaying the list of projects in CRM.io where you want the contact to be exported. Select the project and Save it.
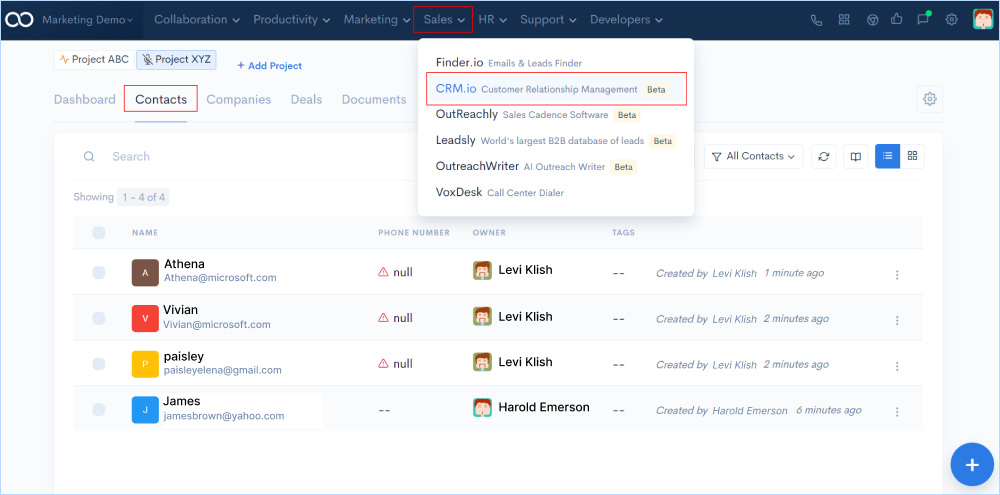
The contact is exported to CRM.io and you can open the app from the suite separately and get the list of exported contacts from the Contacts section.
Get complete data on the appointments being scheduled based on dates, days and categories using bar charts and pie charts and them share across the team.
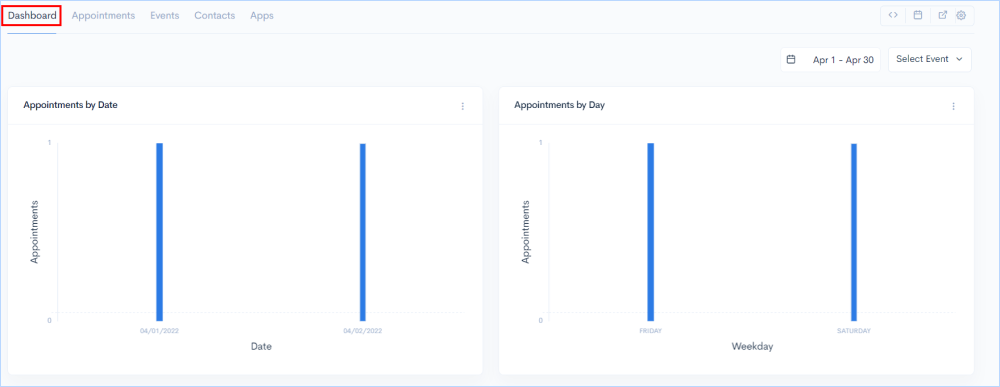
Go to Dashboard in the features section.
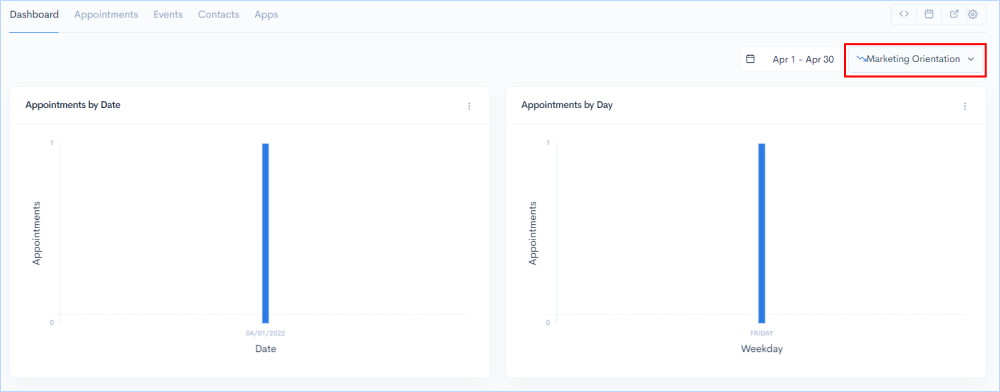
Customize your reports by applying filters based on each event created. To do this, apply filter on the top right of the Dashboard section.
You can also download any report in multiple formats(JPEG, PNG) or even print it out. To do this, this click on the kebab menu (3 dots menu) next to each graph.
Go to the next level with ![]()
Get 50 other apps with Schedule.cc - Join the SaaS Revolution - 500apps, $14.99/user flat pricing, 24/5 Support (Phone/Email/Onboarding)
